Throughout the project I have used a variety of different media technologies that have helped me achieve my successful final tasks. From this project I have learnt a lot about the variety of media technologies that are on offer, this, has allowed me to experiment with different cameras and editing software throughout my project so I could see what ones suited me best. Without the aid of the media technologies I have used my project it would of been very hard to create a professional and effective end product.
Blogger
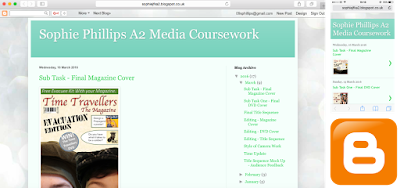 Firstly, blogger has helped me keep organised and on track throughout the project, I chose blogger to display my creative journey as it is easy to use and view anywhere. When choosing a blog to display my work, I felt that blogger was best for me because, as a first time blogger I felt it was simple and easy to use. You can also use Blogger on iPads and iPhones which allowed me to always have easy access to my work. This came particularly useful when filming and editing as I could refer pack to my initial ideas and carry out research quickly and effectively. Furthermore, Blogger allowed me to display my creative process clearly and, chronologically so that people could see what I done during specific months and, how my products developed over time. Finally, using blogger during this project has been particularly useful as I could quickly note down ideas then go back later on when I had time and further develop them this is because, blogger allows you to edit previous work without changing the chronological order.
Microsoft Excel
 During the planning stages of my project I used Microsoft Excel to make a simple and effective gantt chart that I could easily follow throughout. I found using a gantt chart very successful as I could follow a basic plan that included all the tasks I had to complete and, within the specific time frames. Also, with Excel I could go back and edit the time frames for when I fell behind with tasks or needed more time to complete tasks such as, filming and, editing. Overall, I think creating a gantt chart was key to my success in meeting the final deadline as, I carefully planned out what tasks I needed to complete from the beginning to the end of the project.
Microsoft PowerPoint
When researching existing Magazine and DVD covers I used Microsoft PowerPoint to display my findings. I chose PowerPoint because, I feel that I could use it easily and effectively so that I could conduct quick and easy research. Also, by displaying my work through powerpoint I felt it was more appealing and easier to read, instead of long paragraphs I wrote simple sentences under a variety of sub headings making it easier to refer back to. PowerPoint like, Microsoft Word, spell checks your work, Therefore, I could ensure I produced grammatically correct research throughout. I also, used PowerPoint for brainstorming ideas as it allowed me to make simple easy to read mind maps. I found that throughout the project mind maps were particularly helpful when thinking of ideas and planning my TV Drama's name. When concluding resear they were also helpful as I could quicky refer back to my findings and incorporate them in my project.
YouTube
When researching I also found You Tube particularly helpful for finding exsiting Title
sequences that were aimed at a similar target market to mine. YouTube offers a large variety of short clips that can be watched anywhere on any device. This was particularly useful for me as when ever I had spare time I could easily access you tube and analyse videos for conventions and research. Also, with Blogger I could upload videos from YouTube easily to my blog by just copying and pasting the link, this has been particularly helpful as viewers can read my analysis whilst the video is playing as they can be placed side by side. YouTube was not only a helpful media technology when researching but I could also publish my own videos which makes them easy for everyone to access. This also meant that they would be compatible for all devices so that everybody could view them.
CanonEOS 1100D
During the construction stages I chose to use the CanonEOS 1100D to film my final title
During the planning stages of my project I used Microsoft Excel to make a simple and effective gantt chart that I could easily follow throughout. I found using a gantt chart very successful as I could follow a basic plan that included all the tasks I had to complete and, within the specific time frames. Also, with Excel I could go back and edit the time frames for when I fell behind with tasks or needed more time to complete tasks such as, filming and, editing. Overall, I think creating a gantt chart was key to my success in meeting the final deadline as, I carefully planned out what tasks I needed to complete from the beginning to the end of the project.
Microsoft PowerPoint
When researching existing Magazine and DVD covers I used Microsoft PowerPoint to display my findings. I chose PowerPoint because, I feel that I could use it easily and effectively so that I could conduct quick and easy research. Also, by displaying my work through powerpoint I felt it was more appealing and easier to read, instead of long paragraphs I wrote simple sentences under a variety of sub headings making it easier to refer back to. PowerPoint like, Microsoft Word, spell checks your work, Therefore, I could ensure I produced grammatically correct research throughout. I also, used PowerPoint for brainstorming ideas as it allowed me to make simple easy to read mind maps. I found that throughout the project mind maps were particularly helpful when thinking of ideas and planning my TV Drama's name. When concluding resear they were also helpful as I could quicky refer back to my findings and incorporate them in my project.
YouTube
When researching I also found You Tube particularly helpful for finding exsiting Title
sequences that were aimed at a similar target market to mine. YouTube offers a large variety of short clips that can be watched anywhere on any device. This was particularly useful for me as when ever I had spare time I could easily access you tube and analyse videos for conventions and research. Also, with Blogger I could upload videos from YouTube easily to my blog by just copying and pasting the link, this has been particularly helpful as viewers can read my analysis whilst the video is playing as they can be placed side by side. YouTube was not only a helpful media technology when researching but I could also publish my own videos which makes them easy for everyone to access. This also meant that they would be compatible for all devices so that everybody could view them.
CanonEOS 1100D
During the construction stages I chose to use the CanonEOS 1100D to film my final title

sequence and, to take photographs for my DVD and, magazine cover. This camera helped significantly during the construction of my title sequence and, ancillary tasks because, it not only recorded but, it also captured photographs, this meant I only had to use one easy to transport camera on set. Although this camera took a while to get used to it was easy to use for beginners like me as it has an auto focus feature that allows you to capture the best possible image according to the lighting and background. I found that throughout this project the more I experimented with the camera the more I got used to its different features. You can see this development throughout my blog as, at the beginning some of my test shots were slightly out of focus and the image was dull but, as my skills broadened towards the end project I was able to focus the camera manually and zoom smoothly. Alongside the camera I also used a Tripod to stabilise the camera so that I could achieve high quality footage and images.
Green screen
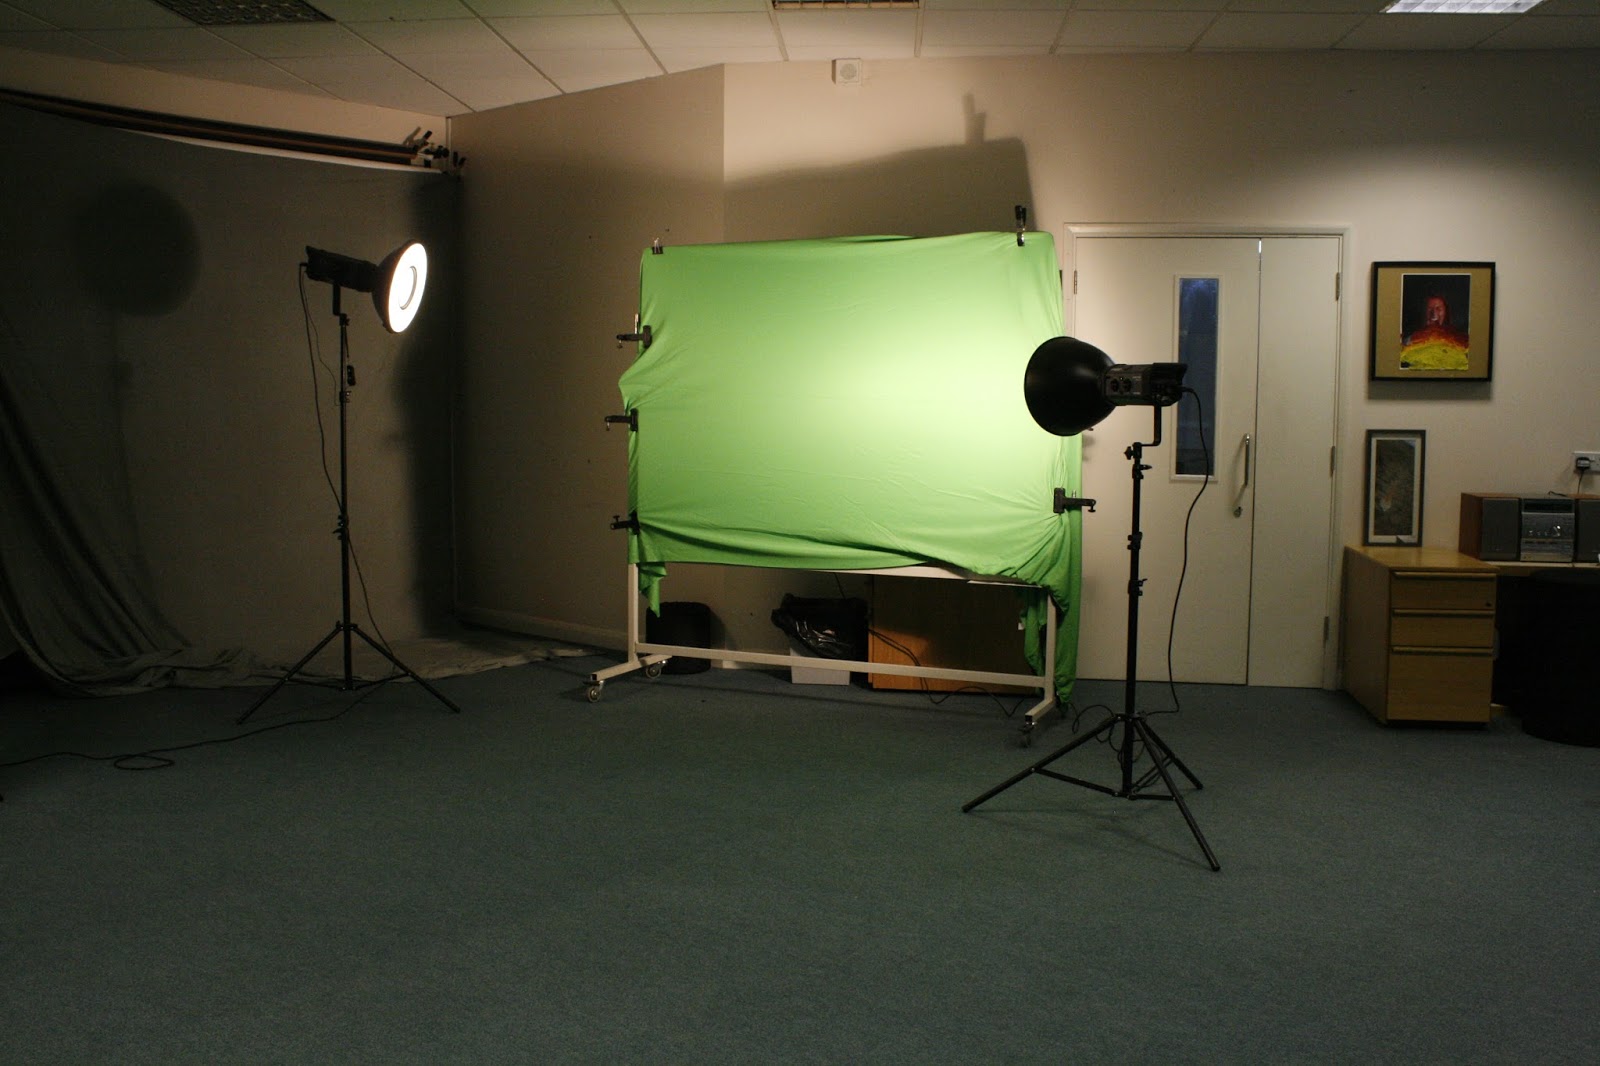
 During the construction stages of my project I also used the green screen for the backdrop of all my videos.This is because, during the experimentation stages of my project I found that using green screen technology for my backgrounds was more effective than lots of different locations as they clearly highlighted the time travelling theme that I might not of been able to recreate. At the beginning of the project, green screen technology was very new to me, I had never used it or even thought about using it before, when I found I had access to it I thought I would experiment just to see what the out come is like and, how easy it is to use. With the help of iMovie I found it very easy to use and, highly effective which is why I chose it to use in my final title sequence. With this technology I like how you have the freedom to choose any back drop you want and, I found this very effective for my title sequence as I wanted to create the sense of time travel with lots of different backgorunds. Without green screen the filming for my title sequence would of been very long and laborious as I would of had to keep changing location, I would of also had to find and, research lots of different locations that clearly highlighted what decade the children were in.
iMacs/ Macbook
During the construction stages of my project I also used the green screen for the backdrop of all my videos.This is because, during the experimentation stages of my project I found that using green screen technology for my backgrounds was more effective than lots of different locations as they clearly highlighted the time travelling theme that I might not of been able to recreate. At the beginning of the project, green screen technology was very new to me, I had never used it or even thought about using it before, when I found I had access to it I thought I would experiment just to see what the out come is like and, how easy it is to use. With the help of iMovie I found it very easy to use and, highly effective which is why I chose it to use in my final title sequence. With this technology I like how you have the freedom to choose any back drop you want and, I found this very effective for my title sequence as I wanted to create the sense of time travel with lots of different backgorunds. Without green screen the filming for my title sequence would of been very long and laborious as I would of had to keep changing location, I would of also had to find and, research lots of different locations that clearly highlighted what decade the children were in.
iMacs/ Macbook
 When it came to downloading and editing footage I used my own MacBook instead of the ones on offer at school, this is because, once you download the footage and start editing you must stay on the same computer therefore, I didn't want to be restricted to only editing at school. Downloading the videos onto my own macbook gave me greater freedom as I could edit whenever I had some spare time. Without being restricted to only editing at school also, meant that I could spend more time focusing on small details that I may not of noticed in the busy, hectic school environment. I chose to use MacBooks and iMacs instead of Windows PCs as Apple offer a wider range of editing softwares such as iMovie, iStudio and, LiveType that helped me achieve a more porffesional and appealing end product.
iMovie
When it came to downloading and editing footage I used my own MacBook instead of the ones on offer at school, this is because, once you download the footage and start editing you must stay on the same computer therefore, I didn't want to be restricted to only editing at school. Downloading the videos onto my own macbook gave me greater freedom as I could edit whenever I had some spare time. Without being restricted to only editing at school also, meant that I could spend more time focusing on small details that I may not of noticed in the busy, hectic school environment. I chose to use MacBooks and iMacs instead of Windows PCs as Apple offer a wider range of editing softwares such as iMovie, iStudio and, LiveType that helped me achieve a more porffesional and appealing end product.
iMovie
 As the construction stages developed I chose iMovie to create my title sequence because, I could trim,combine, and speed up my original video clips. iMovie also offers a variety of other features that other editing softwares don't offer for example, green screen technology and ken burns which allowed me to crop the background in my clips. iMovie also, offered features such as 'picture within picture' that allowed me to follow typical title sequences conventions, this resulted in a more professional and accurate title sequence that is similar to exsiting media products. Finally, I chose to use iMovie for the construction of my title sequence as its precision editor allowed me to make sure my title sequence flowed effectively which resulted in an appealing and execrating title sequence.
LiveType
As the construction stages developed I chose iMovie to create my title sequence because, I could trim,combine, and speed up my original video clips. iMovie also offers a variety of other features that other editing softwares don't offer for example, green screen technology and ken burns which allowed me to crop the background in my clips. iMovie also, offered features such as 'picture within picture' that allowed me to follow typical title sequences conventions, this resulted in a more professional and accurate title sequence that is similar to exsiting media products. Finally, I chose to use iMovie for the construction of my title sequence as its precision editor allowed me to make sure my title sequence flowed effectively which resulted in an appealing and execrating title sequence.
LiveType
 To further enhance my title sequence I used LiveType to construct a memorable logo for mytitle sequence. this software allowed me to experiment a create a logo for my title sequence that moves as it offers a variety of different effects such as, the barrel jump. Before this project i hd never used this software but, i quickly got used to it as it is very simple and easy to use. I felt this software was crucial to the construction of my title sequence as it allowed me to follow the title sequenece conventions of the the eye caching logo a the end of the sequence. once i had made my logo it was easy to save snd import into iMovie to use and felt overall it was highly successful and works well in my sequence.
Photoshop
Whereas, I used iMovie to edit my videos for my main task, for my ancillary tasks I used
Photoshop Elements. When creating my magazine and DVD cover I found that Photoshop was a very helpful software to use. I had previously used photoshop last year when making my Music and school magazine so I further enhanced my skills to create high quality eye catching photographs. When making my magazine and DVD cover I wanted a high quality professional looking photos and, Photoshop helped me to achieve this. Firstly I used the 'Magnetic Lasso' tool which allowed me to delete the bright green background. After removing the background I then used the 'Sponge tool' which allowed me to touch up any imperfections and make the image bright and of a high quality. I found Photoshop a particularly useful tool when making my magazine cover as I could achieve a professional looking photo that stands out on both my magazine and the shop shelves
iStudio
To further enhance my title sequence I used LiveType to construct a memorable logo for mytitle sequence. this software allowed me to experiment a create a logo for my title sequence that moves as it offers a variety of different effects such as, the barrel jump. Before this project i hd never used this software but, i quickly got used to it as it is very simple and easy to use. I felt this software was crucial to the construction of my title sequence as it allowed me to follow the title sequenece conventions of the the eye caching logo a the end of the sequence. once i had made my logo it was easy to save snd import into iMovie to use and felt overall it was highly successful and works well in my sequence.
Photoshop
Whereas, I used iMovie to edit my videos for my main task, for my ancillary tasks I used
Photoshop Elements. When creating my magazine and DVD cover I found that Photoshop was a very helpful software to use. I had previously used photoshop last year when making my Music and school magazine so I further enhanced my skills to create high quality eye catching photographs. When making my magazine and DVD cover I wanted a high quality professional looking photos and, Photoshop helped me to achieve this. Firstly I used the 'Magnetic Lasso' tool which allowed me to delete the bright green background. After removing the background I then used the 'Sponge tool' which allowed me to touch up any imperfections and make the image bright and of a high quality. I found Photoshop a particularly useful tool when making my magazine cover as I could achieve a professional looking photo that stands out on both my magazine and the shop shelves
iStudio

 Finally, during the construction stages of my ancillary tasks used the publishing software iStudio. Like, Photoshop Elements I also, used iStudio last year to make my music and school magazines. When I began using iStudio last year it took me a while to get used to and, I think this became apparent in my final products. However, this year I feel a lot more confident in using this software and, I feel my skills have enhanced to create overall a more professional looking products.I chose this software as it allowed me to create layers within my magazine so that I could overlap images and sub stories. iStudio also offered a variety of different textures filters for shapes, I chose the washed out letter fill as I feel that it tied in well with the WW2/evacuation theme. This therefore created a more professional and effective DVD cover, I also used the same fill on my magazine cover so that they tie in together. Finally iStudio allowed me to fit my images to specific shapes so that I could create the overall split image that I wanted.
Evaluation stages
During the evaluation stages I have used both Blogger and Microsoft Word to write and reflect on my project. Through this stage I have used blogger to reflect and look back on my project and how my work developed throughout the eight months. At the beginning of the project I chose to use blogger as, it displayed my work chronologically, this has been useful during the evaluation as I could quickly find certain tasks I had completed during certain months and reflect on my progress. I also, used Microsoft word to type up all my work as it spell checks my work and I can quickly read back through and correct mistakes.
Throughout the project I regularly conducted target audience feedback , this was so that I could see if my products appealed to the young market and gather constructive comments associated with them . Audience feedback is vital to any project with a client because, you need lots of different opinions in order for the product to appeal to a mass market. Overall, iI feel that the audience feedback I conducted throughout the project was highly successful as, I have made three media projects that are eye-catching and most importantly appealing to my audience.
 The first audience feedback I conducted was when I had to decide on a TV Drama theme and, a catchy memorable name. Audience feedback was important at this stage as I had to chose an idea that was neutral so that it appealed to everyone in my target audience, both male and, female. When choosing a TV drama theme I used a simple tally chart system in which I asked several members of my audience to pick their favourite, this was a quick and effective way for audience feedback as I could clearly see what theme was the most popular and, the one that was the least popular. I again used a simple tally chart questionnaire when deciding the name of the program, this was because, when under a strict time schedule this was an easy and effective way for the audience to have their say on the programs name. This was important as it would be the branding for the show therefore , it had to be memorable and recognisable for the children when on the television or shop shelves. Throughout the project I used this way of conducting simple audience feedback purely for convenience, if I did a similar project again I would maybe ask the children for some comments along side the tally just to see their thoughts behind the names and ideas. This would of helped me in the long run as I could of done small amounts of in depth feedback rather than, lots of different feedback sessions.
Main Task
The first audience feedback I conducted was when I had to decide on a TV Drama theme and, a catchy memorable name. Audience feedback was important at this stage as I had to chose an idea that was neutral so that it appealed to everyone in my target audience, both male and, female. When choosing a TV drama theme I used a simple tally chart system in which I asked several members of my audience to pick their favourite, this was a quick and effective way for audience feedback as I could clearly see what theme was the most popular and, the one that was the least popular. I again used a simple tally chart questionnaire when deciding the name of the program, this was because, when under a strict time schedule this was an easy and effective way for the audience to have their say on the programs name. This was important as it would be the branding for the show therefore , it had to be memorable and recognisable for the children when on the television or shop shelves. Throughout the project I used this way of conducting simple audience feedback purely for convenience, if I did a similar project again I would maybe ask the children for some comments along side the tally just to see their thoughts behind the names and ideas. This would of helped me in the long run as I could of done small amounts of in depth feedback rather than, lots of different feedback sessions.
Main Task
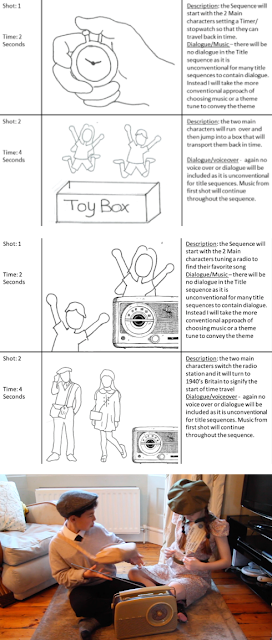 Regarding my title sequence, I carried out feedback sessions throughout the project to make sure it appealed to my young target audience. After my initial designs (post 'Storyboards') I asked my target audience for some feedback and, they expressed how they were not keen on the starting as they felt it didn't grab their attention when on the TV. They also said it was cliché of time travelling programs and advised me to do something more original. This feedback was vital to the development and, final out come of my title sequence as without this advice I would of started to film my original ideas and would of had to change it later on which, would of been an inconvenience. After, the feedback I then thought about a new, original, opening scene to my title sequence, this was when I came up with the radio idea, this can be see on the 'Storyboard revisions' post. Once I had drawn out and, explained my new idea they all commented on the originality of the idea and felt it was more appealing to them and their peers. Looking back on my original storyboard it was a very boring and cliche idea and, the audience feedback I gathered was crucial to my end product. if I hadn't of carried out this feedback my end result would of been boring and, unappealing as I was making the title sequence like I wanted and not what my audience wanted. I again carried out more feedback regarding my Title sequence after my mock up, this was again crucial to the success of the project as it was my audiences final time to tell me what they liked and disliked and some final advice/improvements. This feedback session was very in detail as I showed them all the video and allowed them to write down their own thoughts and feelings. This helped my project develop and become appealing as it was a second opinion on what I initially thought was a successful project. By letting them to write down their opinions allowed me to read them and draw similarities between the comments, for example, lots of the children commented on the repetitive nature of the sequence stating that the backgrounds were all very similar. A lot of the children also commented on the 'Dull lighting' which created a boring and unappealing product. I therefore, took these comments on board when filming my final title sequence which I feel, resulted in a more professional looking final project, the differences between my mockup and final title sequence are very clear highlighting that I listened to all the comments and took the audiences opinions on board. I feel that this added to the success of the project greatly as it resulted in a sequence that appealed to my chosen target audience and, not just what I thought would appeal to them.
Magazine Cover
Regarding my title sequence, I carried out feedback sessions throughout the project to make sure it appealed to my young target audience. After my initial designs (post 'Storyboards') I asked my target audience for some feedback and, they expressed how they were not keen on the starting as they felt it didn't grab their attention when on the TV. They also said it was cliché of time travelling programs and advised me to do something more original. This feedback was vital to the development and, final out come of my title sequence as without this advice I would of started to film my original ideas and would of had to change it later on which, would of been an inconvenience. After, the feedback I then thought about a new, original, opening scene to my title sequence, this was when I came up with the radio idea, this can be see on the 'Storyboard revisions' post. Once I had drawn out and, explained my new idea they all commented on the originality of the idea and felt it was more appealing to them and their peers. Looking back on my original storyboard it was a very boring and cliche idea and, the audience feedback I gathered was crucial to my end product. if I hadn't of carried out this feedback my end result would of been boring and, unappealing as I was making the title sequence like I wanted and not what my audience wanted. I again carried out more feedback regarding my Title sequence after my mock up, this was again crucial to the success of the project as it was my audiences final time to tell me what they liked and disliked and some final advice/improvements. This feedback session was very in detail as I showed them all the video and allowed them to write down their own thoughts and feelings. This helped my project develop and become appealing as it was a second opinion on what I initially thought was a successful project. By letting them to write down their opinions allowed me to read them and draw similarities between the comments, for example, lots of the children commented on the repetitive nature of the sequence stating that the backgrounds were all very similar. A lot of the children also commented on the 'Dull lighting' which created a boring and unappealing product. I therefore, took these comments on board when filming my final title sequence which I feel, resulted in a more professional looking final project, the differences between my mockup and final title sequence are very clear highlighting that I listened to all the comments and took the audiences opinions on board. I feel that this added to the success of the project greatly as it resulted in a sequence that appealed to my chosen target audience and, not just what I thought would appeal to them.
Magazine Cover

Throughout the project I also, gathered a range of audience feedback regarding my Magazine cover in order, to create a successful cover that would stand out on the shop shelves against competitors. Firstly, I gathered feedback regarding my initial designs, many of the children commented on the exciting image of the split children's faces, they all said it was unique and eye catching. The readers also, liked the bold headline for the main cover story that they felt would stand out on the shop shelved, they also liked the variety of sub-stories. However, when it came to making mock ups I ignored my initial pencil drawings and tried to make a simple cover that would be clear for the children to read. When gathering feedback from my audience regarding my mock ups they didn't like the new design as they felt it looked 'too educational' and the main cover image was 'boring' and 'unappealing'. After this, I realised how much I need to listen and take on board audience feedback as that relies on the success of my final products. I realised that I should take on board their comments and, make a magazine that actually appealed to them and no just what I thought would appeal to them. After my mock up feedback, I looked back at my initial ideas that were more successful and built up new ideas based on them, I combined successful elements from both covers, for example, I used the 'evacuation edition' stamp idea in my final products as the audience commented on how effective it was. But, I then changed the main image back to one similar to my initial ideas that the audience liked better than the mock up.
Overall, I feel that this feedback resulted in an informative and appealing magazine that clearly highlights the time travelling theme and the main cover story to the young audience. However, I do feel that not taking on board my initial audience feedback resulted in a less professional product than my other tasks . This was because, I was running out of time and, had to design a new cover whilst completing other tasks, this is why it may appear very simple and slightly rushed.
DVD Cover
 Finally, I feel that my DVD cover was highly effective as I again took audience feedback into account and listened to what they liked and, disliked about the Cover. After realising the importance of target audience feedback when making my magazine cover, I made sure that I listened and took all their comments into account so that I did not waste time having to redesign the product. When gathering feedback from my initial pencil design,the children all commented on the effectiveness of the main image as it was something unique compared to other DVD covers. They also commented on how the text was simple and easy to read from a distance, this feature was particularly popular amongst the younger target audience members. Once I had made my mock up I again gathered target audience that helped add to the success of my final product, this time I carried out more detailed target audience feedback so that I could ensure my final product was a success. To do this, I showed the children my mock up and gave them a piece of paper for them to write own the positives, negatives and potential improvements. When reading through the children's comments iI could draw similarities ,for example, many children commented on how they disliked the red background as it takes focus away from the Logo and makes it hard to read. This then helped me as when making my final product in iStudio I explored a variety of different backgrounds and instead chose a pale yellow which helps the red logo and main image stoa out from a distance. I also, reduced the harsh back lines dividing up the images as many of the children commented on how it took the focus off the characters, although it is only a small change I think that it was highly effective. I feel that my continual audience feedback throughout this task resulted in a professional and, appealing product that grabs my chosen audiences attention when on the shop shelves.
Overall, throughout this project I have learnt that the audience feedback is key to a successful end product because, their opinion is valuable as they know their audience/age range better than you. I have found audience feedback very helpful as when I did not listen to it ,for example, when making the magazine cover, I ended up with a dull and boring product that the children said they would not buy. This then wasted time as I had to redesign the cover and take on board all their comments, this was particularly hard as I was on a tight schedule in order to complete everything before the deadline. Continual feedback throughout the project allowed my audience to create a product with me that they will enjoy and will appeal to their friends. In conclusion, I am very happy with all the positive and constructive feedback I have received from my audience as it has resulted in a more professional and successful product that appeals to my chosen market.
Throughout the project I have used a variety of different media technologies that have helped me achieve my successful final tasks. From this project I have learnt a lot about the variety of media technologies that are on offer, this, has allowed me to experiment with different cameras and editing software throughout my project so I could see what ones suited me best. Without the aid of the media technologies I have used my project it would of been very hard to create a professional and effective end product.
Blogger
Firstly, blogger has helped me keep organised and on track throughout the project, I chose blogger to display my creative journey as it is easy to use and view anywhere. When choosing a blog to display my work, I felt that blogger was best for me because, as a first time blogger I felt it was simple and easy to use. You can also use Blogger on iPads and iPhones which allowed me to always have easy access to my work. This came particularly useful when filming and editing as I could refer pack to my initial ideas and carry out research quickly and effectively. Furthermore, Blogger allowed me to display my creative process clearly and, chronologically so that people could see what I done during specific months and, how my products developed over time. Finally, using blogger during this project has been particularly useful as I could quickly note down ideas then go back later on when I had time and further develop them this is because, blogger allows you to edit previous work without changing the chronological order.
Microsoft Excel
During the planning stages of my project I used Microsoft Excel to make a simple and effective gantt chart that I could easily follow throughout. I found using a gantt chart very successful as I could follow a basic plan that included all the tasks I had to complete and, within the specific time frames. Also, with Excel I could go back and edit the time frames for when I fell behind with tasks or needed more time to complete tasks such as, filming and, editing. Overall, I think creating a gantt chart was key to my success in meeting the final deadline as, I carefully planned out what tasks I needed to complete from the beginning to the end of the project.
Microsoft PowerPoint
When researching existing Magazine and DVD covers I used Microsoft PowerPoint to display my findings. I chose PowerPoint because, I feel that I could use it easily and effectively so that I could conduct quick and easy research. Also, by displaying my work through powerpoint I felt it was more appealing and easier to read, instead of long paragraphs I wrote simple sentences under a variety of sub headings making it easier to refer back to. PowerPoint like, Microsoft Word, spell checks your work, Therefore, I could ensure I produced grammatically correct research throughout. I also, used PowerPoint for brainstorming ideas as it allowed me to make simple easy to read mind maps. I found that throughout the project mind maps were particularly helpful when thinking of ideas and planning my TV Drama's name. When concluding resear they were also helpful as I could quicky refer back to my findings and incorporate them in my project.
YouTube
When researching I also found You Tube particularly helpful for finding exsiting Title
sequences that were aimed at a similar target market to mine. YouTube offers a large variety of short clips that can be watched anywhere on any device. This was particularly useful for me as when ever I had spare time I could easily access you tube and analyse videos for conventions and research. Also, with Blogger I could upload videos from YouTube easily to my blog by just copying and pasting the link, this has been particularly helpful as viewers can read my analysis whilst the video is playing as they can be placed side by side. YouTube was not only a helpful media technology when researching but I could also publish my own videos which makes them easy for everyone to access. This also meant that they would be compatible for all devices so that everybody could view them.
CanonEOS 1100D
During the construction stages I chose to use the CanonEOS 1100D to film my final title
sequence and, to take photographs for my DVD and, magazine cover. This camera helped significantly during the construction of my title sequence and, ancillary tasks because, it not only recorded but, it also captured photographs, this meant I only had to use one easy to transport camera on set. Although this camera took a while to get used to it was easy to use for beginners like me as it has an auto focus feature that allows you to capture the best possible image according to the lighting and background. I found that throughout this project the more I experimented with the camera the more I got used to its different features. You can see this development throughout my blog as, at the beginning some of my test shots were slightly out of focus and the image was dull but, as my skills broadened towards the end project I was able to focus the camera manually and zoom smoothly. Alongside the camera I also used a Tripod to stabilise the camera so that I could achieve high quality footage and images.
Green screen
During the construction stages of my project I also used the green screen for the backdrop of all my videos.This is because, during the experimentation stages of my project I found that using green screen technology for my backgrounds was more effective than lots of different locations as they clearly highlighted the time travelling theme that I might not of been able to recreate. At the beginning of the project, green screen technology was very new to me, I had never used it or even thought about using it before, when I found I had access to it I thought I would experiment just to see what the out come is like and, how easy it is to use. With the help of iMovie I found it very easy to use and, highly effective which is why I chose it to use in my final title sequence. With this technology I like how you have the freedom to choose any back drop you want and, I found this very effective for my title sequence as I wanted to create the sense of time travel with lots of different backgorunds. Without green screen the filming for my title sequence would of been very long and laborious as I would of had to keep changing location, I would of also had to find and, research lots of different locations that clearly highlighted what decade the children were in.
iMacs/ Macbook
When it came to downloading and editing footage I used my own MacBook instead of the ones on offer at school, this is because, once you download the footage and start editing you must stay on the same computer therefore, I didn't want to be restricted to only editing at school. Downloading the videos onto my own macbook gave me greater freedom as I could edit whenever I had some spare time. Without being restricted to only editing at school also, meant that I could spend more time focusing on small details that I may not of noticed in the busy, hectic school environment. I chose to use MacBooks and iMacs instead of Windows PCs as Apple offer a wider range of editing softwares such as iMovie, iStudio and, LiveType that helped me achieve a more porffesional and appealing end product.
iMovie
As the construction stages developed I chose iMovie to create my title sequence because, I could trim,combine, and speed up my original video clips. iMovie also offers a variety of other features that other editing softwares don't offer for example, green screen technology and ken burns which allowed me to crop the background in my clips. iMovie also, offered features such as 'picture within picture' that allowed me to follow typical title sequences conventions, this resulted in a more professional and accurate title sequence that is similar to exsiting media products. Finally, I chose to use iMovie for the construction of my title sequence as its precision editor allowed me to make sure my title sequence flowed effectively which resulted in an appealing and execrating title sequence.
LiveType
To further enhance my title sequence I used LiveType to construct a memorable logo for mytitle sequence. this software allowed me to experiment a create a logo for my title sequence that moves as it offers a variety of different effects such as, the barrel jump. Before this project i hd never used this software but, i quickly got used to it as it is very simple and easy to use. I felt this software was crucial to the construction of my title sequence as it allowed me to follow the title sequenece conventions of the the eye caching logo a the end of the sequence. once i had made my logo it was easy to save snd import into iMovie to use and felt overall it was highly successful and works well in my sequence.
Photoshop
Whereas, I used iMovie to edit my videos for my main task, for my ancillary tasks I used
Photoshop Elements. When creating my magazine and DVD cover I found that Photoshop was a very helpful software to use. I had previously used photoshop last year when making my Music and school magazine so I further enhanced my skills to create high quality eye catching photographs. When making my magazine and DVD cover I wanted a high quality professional looking photos and, Photoshop helped me to achieve this. Firstly I used the 'Magnetic Lasso' tool which allowed me to delete the bright green background. After removing the background I then used the 'Sponge tool' which allowed me to touch up any imperfections and make the image bright and of a high quality. I found Photoshop a particularly useful tool when making my magazine cover as I could achieve a professional looking photo that stands out on both my magazine and the shop shelves
iStudio
Finally, during the construction stages of my ancillary tasks used the publishing software iStudio. Like, Photoshop Elements I also, used iStudio last year to make my music and school magazines. When I began using iStudio last year it took me a while to get used to and, I think this became apparent in my final products. However, this year I feel a lot more confident in using this software and, I feel my skills have enhanced to create overall a more professional looking products.I chose this software as it allowed me to create layers within my magazine so that I could overlap images and sub stories. iStudio also offered a variety of different textures filters for shapes, I chose the washed out letter fill as I feel that it tied in well with the WW2/evacuation theme. This therefore created a more professional and effective DVD cover, I also used the same fill on my magazine cover so that they tie in together. Finally iStudio allowed me to fit my images to specific shapes so that I could create the overall split image that I wanted.
Evaluation stages
During the evaluation stages I have used both Blogger and Microsoft Word to write and reflect on my project. Through this stage I have used blogger to reflect and look back on my project and how my work developed throughout the eight months. At the beginning of the project I chose to use blogger as, it displayed my work chronologically, this has been useful during the evaluation as I could quickly find certain tasks I had completed during certain months and reflect on my progress. I also, used Microsoft word to type up all my work as it spell checks my work and I can quickly read back through and correct mistakes.
The title sequence I have created uses, develops and challenges several conventions of real media productions. Firstly my title sequence uses many typical media conventions associated with title sequences, throughout the production I made sure I included several conventions so that it was recognisable a a title sequence and, looked professional.
Length
 One typical media convention of title sequences that I used was that I made sure my project was the conventional length, which, from my research I found was around 30 seconds. This is a typical convention associated with TV title sequences as, they are made to grab the audiences attention and should be short, fast paced so that the viewers engage with the program. Therefore, they must be around 25-30 seconds long as they are only a preview into the program and, as an editor you should not want to show the audience too much as it will spoil the viewing of the program. Throughout the project i wanted to make sure that I stuck to the strict timings, so I had to plan out my storyboard very carefully so that I could include everything I wanted in this short amount of time. Also, when I came to editing it was very hard to stick to this convention as I had a lot of footage I wanted to use, instead, I had to cut and edit several clips and change some of my initial ideas so that I could achieve this. Furthermore, to achieve a 30 second title sequence I also adjusted the speed of several clips so that I could use them, the speed tool on iMovie was very useful as I could speed up certain clips not only so that they fit in with my title sequence but also, so that they kept the fun, upbeat title sequence I was aiming for.
Establishing Shot
 Another typical media convention I used in my title sequence is that it begins with an establishing shot of the children playing with the radio that allows them to time travel in their home. From my initial research into title sequences I found that using an establishing shot for the opening of the sequence was very typical as it helps the viewers establish the location and basic plot of the program. For example, when researching existing title sequences I found that both the 'Good Luck Charlie' and, 'M.I High' title sequence opened with an establishing shot of the location in which it is set,this highlights to the audience the basic theme and plot of the program. I found this convention highly successful for title sequences as the audience, especially younger viewers, can quickly and effectively see the basic theme and outline of the program before its begun. Therefore, for the first shot of my title sequence I wanted an establishing shot of the children with the radio so that the young viewers can clearly see what the TV drama is about and what causes them to time travel. Although I have used a basic establishing shot of the living room and the children with the radio, I slightly developed the convention to convey the time travelling theme. This is because, I wanted to make the theme clear to my young target audience from them first shot ,therefore developed the typical establishing shot of a building or location by showing the childrens costumes change when they played with the radio.
Clear Genre and Target Audience
Another typical media convention I used in my title sequence is that it begins with an establishing shot of the children playing with the radio that allows them to time travel in their home. From my initial research into title sequences I found that using an establishing shot for the opening of the sequence was very typical as it helps the viewers establish the location and basic plot of the program. For example, when researching existing title sequences I found that both the 'Good Luck Charlie' and, 'M.I High' title sequence opened with an establishing shot of the location in which it is set,this highlights to the audience the basic theme and plot of the program. I found this convention highly successful for title sequences as the audience, especially younger viewers, can quickly and effectively see the basic theme and outline of the program before its begun. Therefore, for the first shot of my title sequence I wanted an establishing shot of the children with the radio so that the young viewers can clearly see what the TV drama is about and what causes them to time travel. Although I have used a basic establishing shot of the living room and the children with the radio, I slightly developed the convention to convey the time travelling theme. This is because, I wanted to make the theme clear to my young target audience from them first shot ,therefore developed the typical establishing shot of a building or location by showing the childrens costumes change when they played with the radio.
Clear Genre and Target Audience
 Another convention I have used in my project is that my title sequence clearly conveys the time travelling genre and my young taret audience. From my research I found that all the children's title sequences I researched all conveyed the theme of the program to their target audience, for example, both 'MI High' and 'Grange Hill' conveyed their themes through the colour scheme and the costumes used. For my title sequence I then followed this convention and made sure the time travelling was clear to the young audience, I feel that I achieved this through the iconic costumes and the spiral clock background I used for several scenes of the sequence. When choosing costumes for the characters I made sure they would be recognisable for my young target audience therefore, I chose popular, recognisable costumes such as, the Roman Toga and WW2 evacuees. I further reinforced the time travelling theme of the program through the music I chose, I think that the music I chose was highly successful as it is fun and upbeat, it also has a jazzy 1920's feel that highlights the time travelling aspect. Another convention I followed was that my title sequence clearly conveys my young target audience. From my research I found that all the title sequences I researched used actors and actresses that were a similar age to the target audience. When it came to casting I took this convention into consideration and chose two actors that were within the 6-12 age range of my program. For the Title sequence I also decided for the characters to be brother and sister so that it further highlights that this program is suitable for not only the children but also the family.
Introduces characters
Another convention of real media products that I have incorporatted into my title sequence is
Another convention I have used in my project is that my title sequence clearly conveys the time travelling genre and my young taret audience. From my research I found that all the children's title sequences I researched all conveyed the theme of the program to their target audience, for example, both 'MI High' and 'Grange Hill' conveyed their themes through the colour scheme and the costumes used. For my title sequence I then followed this convention and made sure the time travelling was clear to the young audience, I feel that I achieved this through the iconic costumes and the spiral clock background I used for several scenes of the sequence. When choosing costumes for the characters I made sure they would be recognisable for my young target audience therefore, I chose popular, recognisable costumes such as, the Roman Toga and WW2 evacuees. I further reinforced the time travelling theme of the program through the music I chose, I think that the music I chose was highly successful as it is fun and upbeat, it also has a jazzy 1920's feel that highlights the time travelling aspect. Another convention I followed was that my title sequence clearly conveys my young target audience. From my research I found that all the title sequences I researched used actors and actresses that were a similar age to the target audience. When it came to casting I took this convention into consideration and chose two actors that were within the 6-12 age range of my program. For the Title sequence I also decided for the characters to be brother and sister so that it further highlights that this program is suitable for not only the children but also the family.
Introduces characters
Another convention of real media products that I have incorporatted into my title sequence is

the introduction of the main characters. This convention is vital to title sequences as it helps the audience establish who the main characters are and, their personalities. From my research of existing title sequences I found that they all introduced the characters and the actors who played them through a montage of short clips. When introducing my two main characters I wanted to give the audience a snapshot of their personality and the character dynamics , I achieved this by including several small clips of the characters in different time periods from the program alongside the main image of the character. Although I followed the typical media convention of introducing the main characters with corresponding clips, I slightly challenged this convention as I only included the characters name and not the actors/actresses name. I done this because, I wanted the young audience to know the characters names and not get confused by the actresses names on the screen at the same time. Also, instead of including actors and directors names I challenged this convention as I wanted the focus to be on the characters and, I feel text would distract the audience and complicate the sequence. Instead I will include these features in the ending credits.
Logo at the end of the Sequence
 The final convention associated with title sequences that I have incorporated into my project is that the memorable TV drama logo fades into the first scene of the program. This is a typical convention of title sequences as it is the last thing the audience see before watching the program therefore, the logo must be memorable and eye-catching. The software 'LiveType' helped me achieve this as I could design my logo and choose an effect to make it move in time with the music. This convention also allows the audience to see the TV dramas name before the program begins, therefore it is vital to the production of any title sequence.
Challenges
Although I have used and developed many typical media conventions I have also challenged some when producing my children's TV Drama title sequence. I have already challenged the convention of including the actors and actresses name in the opening sequence and I have also challenged several other conventions.
Camera shots
The final convention associated with title sequences that I have incorporated into my project is that the memorable TV drama logo fades into the first scene of the program. This is a typical convention of title sequences as it is the last thing the audience see before watching the program therefore, the logo must be memorable and eye-catching. The software 'LiveType' helped me achieve this as I could design my logo and choose an effect to make it move in time with the music. This convention also allows the audience to see the TV dramas name before the program begins, therefore it is vital to the production of any title sequence.
Challenges
Although I have used and developed many typical media conventions I have also challenged some when producing my children's TV Drama title sequence. I have already challenged the convention of including the actors and actresses name in the opening sequence and I have also challenged several other conventions.
Camera shots
 One element I have challenged from typical media conventions associated with title sequences is that I have included a variety of different shots and cutaways instead, of the usual medium long shot that is used in many I researched. When researching existing children's title sequences I found that they all used very boring medium long shots that I felt were dull and uninteresting, which meant the audience did not engage with the program quickly. Therefore, I challenged this convention by including a variety of exciting camera shots and cut aways to grab the young audiences attention quickly and effectively. For example, I used a close up at the beginning of the title sequence when I focused on the radio tuning before the children time travel. Another different and exciting shot I used was when the male character throws his hat at the camera and then his costumes change. This not only makes the title sequence more exciting and engaging for the audience but, it also contributes to the fast pace of the title sequence adding to the excitement before the program begins.
 Firstly, blogger has helped me keep organised and on track throughout the project, I chose blogger to display my creative journey as it is easy to use and view anywhere. When choosing a blog to display my work, I felt that blogger was best for me because, as a first time blogger I felt it was simple and easy to use. You can also use Blogger on iPads and iPhones which allowed me to always have easy access to my work. This came particularly useful when filming and editing as I could refer pack to my initial ideas and carry out research quickly and effectively. Furthermore, Blogger allowed me to display my creative process clearly and, chronologically so that people could see what I done during specific months and, how my products developed over time. Finally, using blogger during this project has been particularly useful as I could quickly note down ideas then go back later on when I had time and further develop them this is because, blogger allows you to edit previous work without changing the chronological order.


 During the construction stages of my project I also used the green screen for the backdrop of all my videos.This is because, during the experimentation stages of my project I found that using green screen technology for my backgrounds was more effective than lots of different locations as they clearly highlighted the time travelling theme that I might not of been able to recreate. At the beginning of the project, green screen technology was very new to me, I had never used it or even thought about using it before, when I found I had access to it I thought I would experiment just to see what the out come is like and, how easy it is to use. With the help of iMovie I found it very easy to use and, highly effective which is why I chose it to use in my final title sequence. With this technology I like how you have the freedom to choose any back drop you want and, I found this very effective for my title sequence as I wanted to create the sense of time travel with lots of different backgorunds. Without green screen the filming for my title sequence would of been very long and laborious as I would of had to keep changing location, I would of also had to find and, research lots of different locations that clearly highlighted what decade the children were in.
  When it came to downloading and editing footage I used my own MacBook instead of the ones on offer at school, this is because, once you download the footage and start editing you must stay on the same computer therefore, I didn't want to be restricted to only editing at school. Downloading the videos onto my own macbook gave me greater freedom as I could edit whenever I had some spare time. Without being restricted to only editing at school also, meant that I could spend more time focusing on small details that I may not of noticed in the busy, hectic school environment. I chose to use MacBooks and iMacs instead of Windows PCs as Apple offer a wider range of editing softwares such as iMovie, iStudio and, LiveType that helped me achieve a more porffesional and appealing end product.
  As the construction stages developed I chose iMovie to create my title sequence because, I could trim,combine, and speed up my original video clips. iMovie also offers a variety of other features that other editing softwares don't offer for example, green screen technology and ken burns which allowed me to crop the background in my clips. iMovie also, offered features such as 'picture within picture' that allowed me to follow typical title sequences conventions, this resulted in a more professional and accurate title sequence that is similar to exsiting media products. Finally, I chose to use iMovie for the construction of my title sequence as its precision editor allowed me to make sure my title sequence flowed effectively which resulted in an appealing and execrating title sequence.
 To further enhance my title sequence I used LiveType to construct a memorable logo for mytitle sequence. this software allowed me to experiment a create a logo for my title sequence that moves as it offers a variety of different effects such as, the barrel jump. Before this project i hd never used this software but, i quickly got used to it as it is very simple and easy to use. I felt this software was crucial to the construction of my title sequence as it allowed me to follow the title sequenece conventions of the the eye caching logo a the end of the sequence. once i had made my logo it was easy to save snd import into iMovie to use and felt overall it was highly successful and works well in my sequence.

 Finally, during the construction stages of my ancillary tasks used the publishing software iStudio. Like, Photoshop Elements I also, used iStudio last year to make my music and school magazines. When I began using iStudio last year it took me a while to get used to and, I think this became apparent in my final products. However, this year I feel a lot more confident in using this software and, I feel my skills have enhanced to create overall a more professional looking products.I chose this software as it allowed me to create layers within my magazine so that I could overlap images and sub stories. iStudio also offered a variety of different textures filters for shapes, I chose the washed out letter fill as I feel that it tied in well with the WW2/evacuation theme. This therefore created a more professional and effective DVD cover, I also used the same fill on my magazine cover so that they tie in together. Finally iStudio allowed me to fit my images to specific shapes so that I could create the overall split image that I wanted.


